Friday, October 31, 2014

Intimate Patio Dinner Ideas for Thanksgiving

Thanksgiving is just around the corner, and what better way to spend it with your significant other or family than to serve traditional home-cooked meal (don’t forget the turkey!) and have an intimate dinner with them… And as far as that rhetoric question can be answered, yes there’s a better way to spend Thanksgiving with your family, and that is to take off those patio furniture covers and set up an intimate patio dinner!

               Screengrab from Charlie M Schultz’ A Charlie Brown Thanksgiving
And because having a typical night of turkey and cranberry inside the house or in your favorite restaurant is becoming more of a routine rather than a celebration, here are some lovely-clever ideas to spruce and spice up your Thanksgiving dinner by the patio!

Dim Lights

When it comes to setting up a cozy, ecclectic and welcoming mood, nothing does it better than having a warm lighting. Tungsten lighting is always the perfect choice to harness this pleasant vibe. To do this, you can either set up the entire area with candles and lanterns or simply settle with those LED string lights available in the market. And to intensify the elating vibe your lighting, throw in some light trinkets and chimes to accommodate the breeze with beautiful noises.

Fire Up The Pit

Since the time of Thanksgiving usually falls on during those relatively cold days, might as well take off the fire pit covers for this particular night and spend the after-dinner by enjoying the comforting warmth given by glowing fire. Pair this with a nice bottle of wine, champagne or single malt while sharing stories with your loved ones. Heck, might as well go for the impromptu Thanksgiving S’mores party.

Under Your Umbrella

This time, instead devouring the whole roasted turkey and mashed potatos by yourselves, go for a more unique approach by going for a picnic-style Thanksgiving dinner. Lay a picnic blanket on the grass, carve some of freshly-roasted turkey, pour some cranberry sauce plus some veggies and roll it in a nice, warm pita or Panini bread and partner it with Mac & Cheese (that is if you’re a fan of Chandler Bing from Friends). Of course, don’t forget the wine for your toast. And adding detail to your captivating night by setting up an umbrella lounge by the backyard isn’t such a bad idea for an intimate dinner with your partner.

TENT-giving Dinner

               Setup a tent by the patio to celebrate Thanksgiving with your loved ones
No, don’t misinterpret the sub headliner. It’s a bad pun, please forgive us. Anyway, we just figured, since we’re talking about intimate dinners, why not go further by making it more “exclusive” by pitching your patio tent or screen house and set the table there. Make it even more romantic by matching it with the usual Miles Davis and John Coltrane music on the background. Better yet, hire a player if time and money permits. After all, you want it to be special, right?

On an end note, it doesn’t matter how you celebrate Thanksgiving with your loved-ones. Be it a simple, extravagant or extremely unique celebration, what is important is the essence of being thankful for the year’s worth of blessings, because that’s what it’s all about.

Friday, October 24, 2014

Is Your Firepit Ready for the Cold Season?

Cold season is fast approaching. And as early as today, some of us are already feeling the chilly weather. Perhaps, this is the perfect time to do some maintenance checkup and break-in your outdoor fireplace/fire pit for the coming days ahead.

So before getting all too excited about spending the nightfall in your patio, burning wood while downing a six-pack, here are some things you might want to consider doing to make sure your fire pit and/or outdoor fireplace is ready to be of service for the cold season.
‘tis the time of the year to ready your patio fire pit for the coming cold days
1. Clean off burnt residue from the fire pit – It is a given that fire pits (virtually all fire places) are prone to being dirty and/or blackened due to burnt materials and residue. That’s why it is important to clean it first before setting up your fuel and tinder. Make sure to scrape off creosote –a burnt wood byproduct that can produce burst of flame when re-ignited by fire – and other byproduct build-up that may cause potential fire risks. If you happen to use the pit for outdoor cooking as well, then it is advisable to include the cooking peripherals as well in your pit-cleaning checklist.

2. Check the fire pit for damages – A poorly-maintained fire place or a fire pit imposes potential dangers that could result to serious damages and accidents. Ergo, it is a-must to inspect the entire pit for damages such as cracked mortar and loose or gapped brick/stone for repair. Cement, lime putty or grout can be used to fix these imperfections.

This also goes with portable fire pits; metal-made pits are prone to rusting and corrosion, so it should be checked for deterioration. To repair this, you may use steel brush to remove the flakey stain patch. If some of the parts have been significantly disintegrated, you can patch this with a thin metal sheet and weld it to cover the rusting part.

3. Move your patio furniture – Just to be sure, move some of your patio furniture that may deemed prone to burnt damages in case a sudden spark of tinder lands on it. Instead, use wood chairs and tables to further avoid such accidents. To make it even safer for your precious outdoor furnishings, it is better to shield them from ashes and fumes using a trusty patio furniture cover.

4. Stockpile some fuel – And by fuel, we’re not just talking about gas or kerosene. It is basically the materials that you’ll be using to create and maintain fire. And that includes wood, coal, newspapers, briquette and of course, lighter and/or matches to start one. For those who are using wood, it is important that you should “season” the wood (dried out for 6 days). Go for hardwood like maple, hickory, oak and cherry instead of softwood, as the latter doesn’t last long.

5. Set up a safe spot for children and pets – Because your kids and beloved furry pets want to enjoy the outdoor warmth as well. That being said, you may set up a safe area –ideally a significant feet away from the fireplace – for them to stay. Place a nice, comfy outdoor mattress and a pet throw will do the job in keeping them warm and cozy.

6. Lastly, don’t forget the s’mores essentials – You’re sitting in front of the fireplace, right? So, what are you waiting for? Prepare the s’mores table and start the fire… because an outdoor fireplace wouldn’t be complete without enjoying a stick of roasted marshmallows and a piece of chocolate sandwiched between a pair of biscuits. Heck, might as well get the hotdogs too!

Thursday, October 16, 2014

Stuff That Can Damage Your Smartphone

At times, we tend to take little things for granted (meaning your iPhone, Samsung Galaxy and other smartphones), that it usually results to inadvertent negligence. This is the common cause of acquired scratches, dings and damages to your beloved devices. Yes, you might say, “Not even once in my entire life have I dropped my phone.” followed by “It is basically the extension of my life”.

Little did you know that there are still a lot of threats your device is facing on a day-to-day basis, most of which are barely noticeable, while some are the result of occasional carelessness. These are the stuff that can carry out unwanted damages to your smartphones.

Here are some of them:
 
Photo courtesy: octopocks via instagram
1. Water – Every mobile, smartphone and practically all electronic devices’ number 1 enemy. Be it precipitation, condensation or just pure clumsiness in the form of accidental spillage, it seems that there’s no way your phone is safe from this gadget misfortune. And the damage can be nasty. It can cause your phone to die instantaneously or to say the least, lose some of its functions. Luckily for some, there’s still hope.

What to do? – First and foremost, the right thing to do is to place it somewhere dry and where water is not present. Also, make sure to sleeve a resilient cellphone cover and avoid using or placing it under extreme conditions for a period of time (especially during snow season). Now, we can’t do anything about nature, so the perfect remedy is through nature as well. In the event you accidentally dropped your phone, say in a pool, you have to turn it off, wipe off excess water, detach SIM card and the battery as well (if necessary) then bury it in a tub of uncooked rice in an upright position for 24 hours.

2. Third-Party Cable
– What could go wrong? To answer that question, this cheap lightning cable alternative to iPhone’s exclusive charging and data transfer accessory tends to burn iPhone’s (particularly iPhone 5) component namely the U2 IC, which is responsible for the controlling of the charging of the battery. And the original lightning cable has a specified series of leads that regulates the voltage and the current. These leads are not present on those ripped-off cables, thus releasing excessive amount of voltage, causing the said component to burn.

What to do? – Well, the logical thing to do is to throw away those cheap cables and go for the genuine ones. Made For iPhone accessories such as the authentic lightning cable may be expensive. But as they say,” a good thing is never cheap. But a cheap thing is never good”.

3. Anything in your bag that goes along with your phone – This refers to keys, spare coins, trinkets, keychains, mostly caboodles. Most, if not all of these are the potential culprits for scratching and denting your phone everytime you put it casually in your bag.

What to do? – Aside from encasing your phone with a reliable cover, patching a screen protector onto the device’s screen is a great way to shield your phone’s precious gorilla glass. And in addition to this, the best way to prevent such damages from happening to your phone is to dedicate a specific spot/pocket in your bag for your mobile.

4. Pocket Stuff – Little did you know that pockets can do significant damage to your phone, in the form of those unnoticed debris that’s accumulating in your pants such as lint, sand, hair and other dirt particles. As famous author, Robert Fulghum would put it, “Cosmic Compost”. Still, it does a lot of damages to your phone. Not to mention, those  copper rivets attached on the pocket’s edges can screech your phone’s sleek housing.

What to do? – Same goes with one of those solutions in number 3. Insert protective plugs into the 3.5mm audio plug and USB port. And for some self-serving reason you feel the sense of mobile urgency that you have to bring your phone while calmly walking by the beach, then it is highly suggested to put your phone in a resealable plastic bag to protect it from sand and… you’ve guessed it, WATER! As for the lint, still remember where did you put that iPhone pin thing? If not, use toothpick or a paperclip to take off lint build-up inside the port.

5. Cases and Covers That Don’t Fit – Rule of thumb: “If it doesn’t fit, don’t force it.” Smartphone covers today are now built and made for a specific make and model of mobile device. Hence, it is not advisable to use an incompatible case or cover. Otherwise, it won’t do any good in terms of protecting your phone efficiently.

What to do? – If the label says iPhone covers, then it is solely dedicated for iPhones and iPhones only. That’s the way it has to be. Also, cases have certain materials, so if you want something that’s tough enough to be at par with your active lifestyle, go with the armor-type cases. If you’re the typical posh, easy-go-lucky type of person, get those leather-made covers.
 
Formosa iPhone 5 Wallet Clutch Wristlet Purse Dark Grey

Thursday, October 9, 2014

Cleaning and Maintaining Your Barbecue Grill The Right Way

For some, grilling is an all year ‘round affair, while for others, there’s no better time to have a barbecue party than spring. As for the people of Kansas City, October is the perfect season for smokin’ foods. Whatever the case may be, cleaning your grill should be a routine thing regardless if you’re a barbecue season purist or an enthusiastic charcoal chef. You wouldn’t want your grilled cheeseburger to taste like last year’s kebab (or was it fish?) now, would you? Not to mention, nothing is better with char-cooked bacteria.

Too gross? We know! That’s why this blog post is telling you to make it a point to clean your griller every after use. After all, they ain’t going to clean themselves, and grill covers are just there to cloak your trusty cooker up until the next sizzling sesh!
Photo courtesy: Universal
To keep your grill up and ready for the next skewer session, here’s a guide on how to clean and maintain your grill the right way.

Rule of thumb

The first thing to remember when deciding to clean the grill is to let it cool and allow the ember to subside for a while, but don’t let it die down completely. As for gas-operated and electric grills, preheat the barbecue machine by setting it to “CLEAN” mode or set it to a lower heat setting. It is better to clean barbecue grills when it is still warm as charred food residue and nasty grimes tends to stick on the grates and surface once cooled.
“Grill is still dirty, man!”
Photo courtesy: horrorcultfilms.co.uk
Next step is make sure to the gas tank is closed. For electric-powered grill, unplug the cooking device before you begin with the bbq-brushing-burden. Meanwhile, for charcoal cookers, you may place the used charcoal and ember in a large plastic bag to dispose it properly. Finally, prep up your cleaning paraphernalia including a stiff brush, sponge, clean cloth, soap, and warm/hot water.

Make it “Grate”

Photo courtesy: Alvimann via morguefile.com
Once you’re ready, start by detaching the grates from the cooking equipment. And so goes for the burners, plates, drip pan and flame tamers if necessary. Start by dousing the grate with hot water and soap to soften the accumulated grimes and food residues then scrub it using a steel-bristled brush. For stainless steel parts, use a stiff bristled brush instead or a sponge with a rough side for removing hardened oil stain and carbon accumulation. Furthermore, make sure to brush the underside, inside, wall surface corners and jets of the grill.

If possible, you may also detach the cast iron grill for electric grillers to scrape off sticky oil and food residue from the surface. Likewise with the tube burner for scrubbing carbon build up. Next step is to rub the brushed grimes with a clean cloth or a paper towel. Do this until the black stuff that’s coming off from the griller is totally wiped out. Reinstall the components of the barbeque grill then apply a generous amount of canola or vegetable oil onto the grill frame. This is to help evade rust accumulation especially for cast iron grills and charcoal grates. For treated grates, you may skip the oiling application, and dry it up instead.

Neat Inside and Out

For the outside, it is okay to use a clean cloth soaked in mild soap and warm water. If necessary, cleaning solutions and stainless polishers can be used as well to remove stubborn charcoal stains and stuck grease. After which, give it a finish by dry wiping the panels and surface of the grill.

Safety First… And Last

Formosa Covers BBQ Barbecue Grill Cover
Right before you store your barbecue grill, make sure to check the gas hose and the gauge. Do this by applying a stroke of soapy water onto the hose, if a certain area of the hose forms a bubble, then it’s an indication of leak in your hose. Replace this immediately as it can cause accidental fire and other hazardous accidents. In relation, it is also advisable to unfasten the hose from the gas tank if you think you won’t be using the griller for a long period of time.

And finally, drape it with a barbecue cover to protect and shield your grill against harmful elements such as rain, snow, excessive humidity and the likes. If you don’t have one, this is the right time to check out Formosa Covers array of barbecue grill covers!

Tuesday, September 30, 2014

Common Misconceptions About Using Smartphone Protective Accessories

Just when we thought everything is alright with our precious iPhone and Galaxy Phones, we tend to get even more careless at most times, especially when taking care of our devices.


Fortunately, the gratuity and abundance of cellphone covers and accessories as well as the manufacturer’s initiative to equip their product with scratch resistant materials and reinforced shell layers became a makeshift messiah of the digital age. But as resilient as these covers and protectors are to protect our communication devices, it still isn’t enough to leave the entirety of the phone’s condition solely to its durability features.

To specify, here are some of the most common bits and mistakes we often overlook in taking care of our smartphones.

1. Casings will cover all the bases

Two of the most prone to dirt are the phone’s charging port and the 3.5mm jack plug for the earphones. As common as it gets, these two outlets serve as vacuum gateways for dirt and lint that can usually be accumulated from your pants’ pocket. These dirt elements are basically the number one cause of charging malfunctions, connectivity problems and port damages.

The Right Thing To Do – You need a piece of paperclip, toothpick or a matchstick and clean cotton to scrape off dust that has been collected by the port. Never damp the cotton with any liquid solution, as it will only cause further damage to the phone. Once you have taken off the dust, cut a small piece of adhesive tape and attach it on the other end of the clip, with the sticky part being on the outside of the pin. Lightly roll the adhesive-top pin to take off any stubborn lint and cotton residue that you might have missed out. Although it is not much of a recommendation, it is still good to use one of those protective caps for the plug and port to cover them when not in use.

2. My phone is scratch-free, Thanks to my screen protector!

Indeed, screen protectors are your phone’s screen savers… Literally! But mind you, this does not entirely mean your mobile will become invincible to scratches or worse, cracks. Despite gearing your smartphone with the best scratch-resistant film over its gorilla glass display, putting it in your pocket along with your keys, coins and wallet with metal zippers may still likely to damage your device. Likewise with the shell that encases the phone.

The Right Thing To Do – Investing on a reliable screen protector is one thing. But just to be safe, make sure to allot a separate compartment for your mobile to avoid direct contact with your other stuff. In addition, armor it with a sturdy clutch-like casing to double your phone’s protection, especially the back side’s surface. Lastly, make it a point to clean the inner-surface of the casing from time to time.

3. The case will save my phone from drops

Imagine how worse could it get the moment you drop your phone straight into concrete oblivion. Albeit phone covers are equipped with cushions to absorb shocks after an accidental drop, it is still possible to acquire internal damage to your gadget, especially if gravity tends to magnetize the device from your hands on a regular basis.

The Right Thing To Do – The basic thing to do here is to hold your phone properly. Having a glossy-textured phone shell or a super-thin body is not reason enough to blame the manufacturer for constantly dropping your device. Remember, casings and screen protectors are there to add extra armor to your smartphone, not to entirely save it from the doom of your clumsiness and carelessness.

Thursday, September 25, 2014

Is There A Need To Clean Your ATV?

ATV or All-Terrain Vehicle is designed specifically to withstand various field conditions and road abuse. But just because this vehicle is intended for hitting the dirt, it does not mean you should leave it as is after a whole day of rugged ride. “Leave it to the rain gods” attitude will only make your quad bike look unpleasant to drive on, not to mention could cause serious damages.

atv-covers-protect-quad-bike
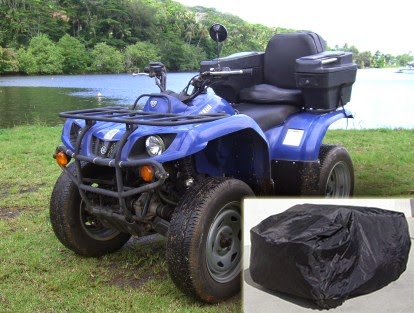
ATV covers protect your recreational quad bike after a good cleaning


Why is it so important to clean your ATV on a regular basis? Because wrapping it casually with your quad cover won’t simply cut it! And because, like any other vehicles, dirt, grimes, scum and other impurities can cause unwanted blemishes, engine issues and rust problems to your precious road warrior.

So, to answer the question: Yes, there’s always the need to clean your ATV because it should be a part of your vehicle’s routine maintenance. So get up and gear up and time to give a well-deserved wash to your quad-bike and/or three-wheelers.

What Could Possibly Go Wrong If You Don’t Clean Your ATV?


A lot of things can go wrong once you developed a high disregard for vehicle maintenance (washing and cleaning for that matter). Just try to picture this: The build-up of dried mud and soil can cause rusting and erosion to your ATV’s components, engine, body kit, and other important parts. Also, the accumulation and spread of invasive plants like forest vines will greatly affect the performance of the buggy if not taken out immediately, as these plants may crawl and latch on to the chassis, fuel line, wires and axle. Not a good visual, don’t you agree?

A Good Ol’ Car Wash


To start, bathe your ATV from all sides preferably with warm water. This is to wash off loose mud, grass and weed that are stuck onto your quad. A power washer is also recommended for use in taking off stubborn mud residue onto the surface and hard to reach areas of the vehicle. Next step is to use mild shampoo or car soaps. Never use ordinary detergents or dishwashing liquid, as it may cause paint degradation. After which, rinse the ATV then dry it using a clean cloth or chamois leather. You may also use car wax and polishers, as well as a tire coating for dust protection and improved shininess.

Check The Hardware


Cleaning your ATV doesn’t stop at drying and polishing its surface. Needless to say, your engine needs a little cleaning as well. You can do this by checking your engine. A clean air filter is vital in maintaining your engine’s mint condition, as it serves as the engine’s screen to deter dirt, sand and other foreign particles that might get sucked in by your ride so make sure to keep it clean, or replace it if necessary. As for the under-chassis, it is important to inspect it regularly in case you’ve missed some hardened sludge during the wash. Moreover, make sure to maintain the water level of the radiator to prevent overheating. It is also important to cleanse the water reservoir by washing the dirt off using running water from the hose.

Lastly, once you’ll bath your ATV in and out, cloak it with your trusty vehicle sheet to maintain your ride’s sleek, clean condition even when not in use. Also, this will shield your wheels from potential dirt and damage accumulation overtime in case you won’t be using the ATV anytime soon.

Wednesday, September 17, 2014

Making Your Pet As Comfy as Possible When Traveling

Most dogs, cats, and most domesticated animals are not “travelers” by nature. That’s why they tend to become uncomfortable and sickly, especially during long travels, which naturally results to being jittery and moody. And for sure, the last thing you want to do when traveling is to clean after your pet’s messy puke and whatnot.

cute-dog-travel
Image Credits: imgflip.com


According to pet guru, Cesar Millan, “Planes and cars aren’t designed with dogs (and cats) in mind, and you need to know what to expect when you reach your final destination”. True to every word, although this post does not dispute the fact that dogs are fond of sticking their heads out of the window and put their tongues out. Perhaps, that’s their way to relieve themselves from travel stress. But that aside, here are some tips to make your pet comfortable enough for long travels.

Allot a Large Space for Them


If you are traveling by car, it is highly recommended that you should let your pet stay in the back seat. This way, dogs and cats can have the whole back space for them to sit and rest on. Although it is still very much ideal to put them in a crate/carrier, most cars, minivans and SUVs today have key features dedicated solely for your pet’s travel convenience, not to mention the spacious rear area. Set up the back seat with a pet-friendly seat cover to armor your car seat and upholstery from unwanted dirt and loose fur/hair. After which, you can pretty much leave the rest to them.

Bring Toys


The thought of seeing your dog/cat stuck in a crate for the next couple of hours is already a burden not only to you but also for your furry fellow. That is why it is always a best practice to bring your pet’s favorite toy/s to help them get through the rough ride. Toys are the perfect item to pacify your pets during long travel, so better keep them handy when packing your dog’s stuff.

Spruce Up the Space


To make your pet, even more comfortable during long trips, make sure to pimp up your dog/cat’s space. Start by placing a pet liner at the back of the car or right inside the crate if you’re taking a plane. You may also throw in his/her favorite blanket. Install a water dispenser to a spot wherein your pets can easily access in case they got thirsty and make sure to pack a “light” snack for them to nibble from time to time.

Make Sure to “Unload the Tank” Before Hopping In


Always make it a point to let your pets do their business first before going on a long trip (peeing and pooing, that is) so that they won’t feel tense while on the road/air. Just to be sure, especially for land travelers, you can always have a quick stop over every once in a while to unload. Also, to avoid “pet accidents”, make sure to feed your pooch and kitty at least 1-2 hours before hitting the road.

soft-pet-cover
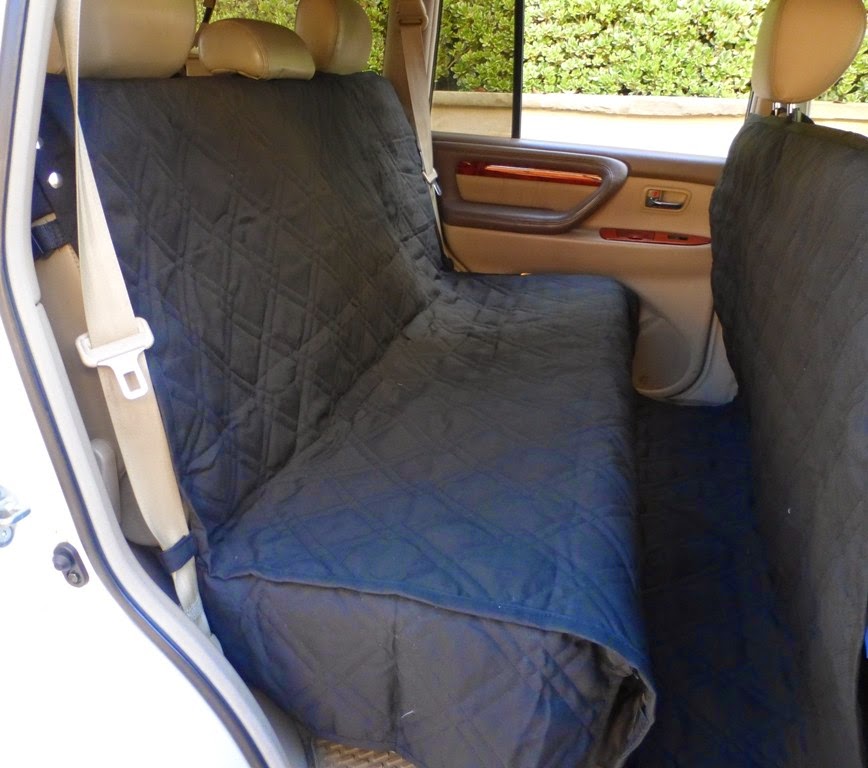
Make sure your pets are comfy enough by setting up their hub backseat with a soft pet cover


These are just some of the best practices in making your furball companions as cozy as possible.